Build a shot list around what each image needs to do
A shot list connects a visual decision to a purpose. “Close-up of the clamp” describes an image. “Show where the mount attaches, so the viewer can judge whether it fits their desk” explains why that image belongs in the sequence.
Try it as you read: open the Shot List & Storyboard Planner and choose “Try the example,” or use the blank worksheet.
Define the viewer and the promise
In the Shot List & Storyboard Planner, name the viewer and the result the sequence needs to deliver. Our fictional example is for a teacher filming demonstrations on a small desk. The promise is to show the framing and stability trade-off before explaining the hardware.
This choice rules out some attractive but unhelpful footage. A slow camera move around unopened equipment does not yet establish the result or the trade-off. It may belong later, or it may have no job in this edit.
Give each shot four decisions
For every row, record the estimated duration, what we see, what we hear and the job of the shot. Be specific enough that another person could prepare the setup. “Film the desk” leaves framing unresolved; “side angle with the clamp and remaining work surface visible” describes the evidence you need.
The audio field can remain empty for a silent shot. If speech continues across two images, repeat or annotate that intention in the notes. The runtime calculation adds shot durations; it does not model audio overlaps, transitions or the timing of an actual editing timeline.
A fourteen-second planning example
| Planned range | Visual | Job |
|---|---|---|
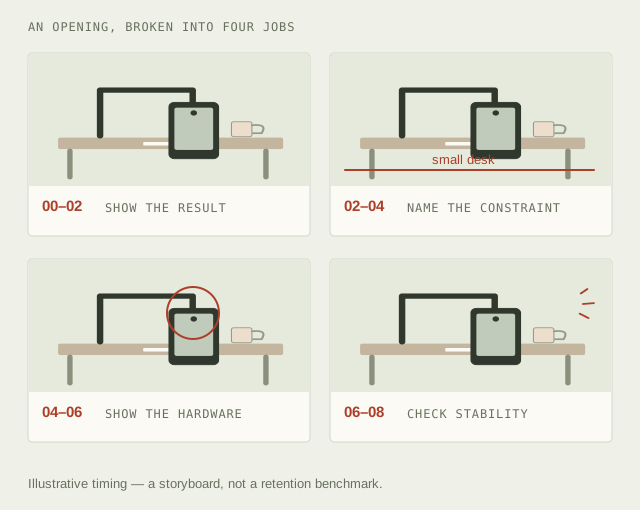
| 0–3 seconds | Finished overhead frame | Establish the outcome |
| 3–6 seconds | Side angle with free desk space | Name the constraint |
| 6–10 seconds | Clamp attachment close-up | Show the required fit |
| 10–14 seconds | Typing and resulting camera movement | Demonstrate the limitation |
These timings are estimates for a fictional sequence. The four-frame illustration shows the same jobs at a different illustrative pace. Neither version is a retention benchmark. The useful comparison is whether the viewer receives the information needed to judge the setup.
Reorder to test the explanation
Use the Up and Down controls to compare two arrangements. Put the hardware close-up first, then ask what a new viewer would know about the final result. Put the result first, then check how quickly you explain the conditions needed to achieve it.
The sequence cards provide a compact reading of the current order. Read them aloud with the audio notes. If a claim arrives before the image that supports it, decide whether that delay creates useful anticipation or simply makes the explanation harder to follow.
Turn the list into a practical filming document
Export the Markdown shot list for a collaborator or your own shoot. Add location-specific details to the visual notes: the visible desk edge, the direction of the light, or a hand that must leave the attachment point unobstructed. Include the limitation shot in the plan so it does not get forgotten when the setup looks good.
If the sequence needs more runtime, estimate it honestly. Shortening a number in the planner does not make a spoken explanation faster or a demonstration clearer. Rehearse the action and revise the estimate before committing to a schedule.
Reconcile the plan with the actual edit
Save a JSON project backup before starting another sequence. After editing, compare the planned jobs with what the footage actually establishes. A missing shot can reveal a missing explanation; it is not necessarily a reason to force the original plan into the final cut.
Use the finished timeline in the chapter planning guide. Chapter boundaries need actual timestamps, not the estimated cumulative times in this shot list. Review dialogue against that same final edit in the Caption Timing Editor.